Safely Record Vinyl To CD From All Sources
1) How Does The TEAC GF-350 Work?
2) Recording Examples.
3) How Many Records Can Be Recorded?
4) Miscellaneous Information.
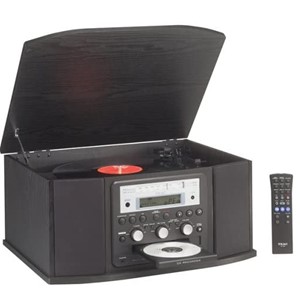
The Teac GF-350 Recorder will safely record all your vinyl records to CD which preserves your vinyl. Records from axillary sources as well. This is an excellent way to preserve your vinyl record collection and hear your favorite selections on CD over and over again.
If you are like most collectors of vinyl records over the years, you probably have a significant collection. This collection may consist of 45’s, 78’s, cassettes, and LP’s. Are you looking for a way to preserve these treasurers? I have found such a machine that does this and more. It will record from any of the following music formats: 45’s, 78’s, MP3, Reel to Reel, Cassettes, and LP’s all to CD. This article will share how this machine records and what supplies you will need to successfully copy your vinyl to CD.
I personally own the Teac GF-350 recorder and I would not be without it. It does just what is says. It records vinyl, and cassettes to CD. I am very happy with my unit as I have recorded many of my 45’s and LP’s to CD.
If you are interested, please read on.
How Does The Teac GF-350 Work?
Very simply, you just set the setting to the speed of the recording type.
- Clean the record.
- Place the record on the turntable.
- Insert a blank CD-R music CD into the CD tray.
- Place the tone arm on the record.
- Press the Play button.
You have the option of how each song should be recorded. Either as one track or a separate track. For example, you have an LP album that has 12 songs on it. You can record each song separately or one side of the LP as one track. If you should decide to record each song separately, the track indicator will increment by 1. You can record up to a maximum of 99 separate tracks or 80 minutes of music per CD, which ever comes first.
If you opt to record a track separately, you will need some additional supplies and they are:
- Additional Needles for the Turntable
- CD Lens Cleaner
- Vinyl Record Cleaner
- Blank CD-R Music CD’s
- CD Cases or Sleeves
- Permanent Markers
- Notebook or Paper (Write Titles/Artists/Times For Each Recorded Track)
- Pen or Pencil
- Decide on the type of format you are recording (45, LP, MP-3, Cassette, etc.), and set-up the unit for that format. Check the owner’s manual for the proper connections.
Follow the Steps Below
The steps are for recording vinyl records:
- Set-up unit for the type of format you are recording.
- Insert a CD-R Music CD in the CD recording tray.
- Allow the system to setup the CD for recording. This can take a few seconds. You may have to refer to the manual for additional instructions in the event an error occurs.
- Write the title of the track being recorded in the notebook. You may add the artist, or title of the album at the top of the paper or notebook.
- During the playback of the record, the time indicator is displayed while the record is being recorded.
- When the end of the playback is complete, just jot down the time for the recording next to the title.
- You have the option of placing a new album or 45 to record on the same CD or you can choose to finalize the CD. Remember, you have up to 79:59 minutes or 99 tracks you can record on one CD.
- The track indicator will be increment by 1.
- Keep this up until you are done with the album or individual song like a 45 or groups of 45’s.
- When you reach the end of the recording time on a CD, it must be finalized so the CD can be played in the CD player.
- After the CD is finalized, you can write on the face of the CD any information about the material recorded. You use a permanent marker to add this information.
- Place the CD in a CD Case or Sleeve to protect it from dust, dirt and grime for storage.
Recording Examples
Below are some examples for recording your music collection.
Recording LP As A Single Track
You own an LP you want to record. The LP has 12 songs on it 6 songs or tracks on each side. You place the album title and artist at the top of a sheet of paper. You set up the machine for an LP to CD recording. You decide to record side one of the album first, with side 1 being one track. At the end of the album, you proceed to record side 2. The CD will have recorded 2 tracks on it. Side one being on track 1 and side 2 on track 2.
Recording Each LP Song As An Individual Track
In this example, you will record the same LP with twelve songs on it. However, this time you want to record each song separately. Again, place the album title and artist at the top the of paper. Set up the machine for an LP to CD recording. Enter the LP songs first title and leave the time area blank. Record the first song of the record. When the song is finished, notice the time and press the stop button to set up the next track. The time on the display panel is now reset to 0:00 for the next track. Record the tracks time on the paper. Now, record the albums second song after entering the title of the second song on the sheet of paper. Repeat this process until the first side is completed. Turn over the LP to record side 2. Repeat doing this until the second side is recorded. The CD will have 12 tracks recorded on it. Each corresponding to those recorded on the LP Side 1 songs tracks 1-6 and Side 2, songs tracks 7-12.
Finalizing or Not
At this point you have a decision to make. Do you finalize the CD or not? In the first example, the CD has 2 tracks and the second, the CD has 12 tracks. Both have the same amount of time used for recording it to CD. Before finalizing, you must decide on continuing to record other albums for the same artist or finalize. Or, record a different album or 45’s. Once you finalize, you cannot add additional material to a finalized CD. Even if you have lots of room left to make additional recordings on it. Be sure you want to finalize the CD before you actually do it.
Additional Tips
The CD-R Music CD’s has room to record up to 79:59 minutes of music. Each album takes anywhere from 30 to 40 minutes to record both sides for most LP’s. Some of the newer LP’s may take the entire CD for one album.
One easy way to determine the time, is to add up the times stated on the albums label and convert into seconds. For example, the time on the label for the 1st song is 3:55. This equates to 235 seconds (60 x 3 = 180 +55 = 235). The CD contains 4,799 seconds for recording music. This will give you an idea of how much space will be used for recording the album. If the album song times are greater than 4,799, you must determine which songs to record and in what order.
Note: If you are nearing the end of a CD during a recording, the system will automatically finalize the disc. When the time reaches 79:59, the system will finalize. If this happens to you, just re-record the song that was playing at the time when the system finalized the CD to a new CD.
One advantage of recording individual songs in tracks is that you can use the track feature on the CD player to go to the specific song track you want played.
How Many Records Can Be Recorded?
We will try to break this down for you using LP’s and 45’s, as these are the most common types of vinyl records to convert into CD.
45’s
On average, you can expect to record anywhere from 25 to 35 records on one CD for the A side only. If you decide on recording both the A and B sides of each record, reduce these numbers by half (13-18). The number of records will be determined by the time for each recording. For 45’s in the 50’s and 60’s, they average from 2 to 3 minutes per side. For 45’s in the 40’s, they average from 3 to 4 minutes per side. The same is true for 78’s, they are mostly from the 1930’s and the 1940’s. There are a small number of 78’s made in the 1950’s.
LP’s
Most LP’s have between 9 to 12 song tracks on a record depending on the format type. Some LP’s may only have two or three tracks per side, especially on later LP’s. If your collection consists of albums from the 1950’s through the 1970’s, you can expect them to have anywhere from 9 to 12 tracks on them.
For older LP’s for music in (1950’s, 60’s & 70’s) you can expect to record up to 2 full LP albums per CD. In some cases, even side 1 of the 3rd LP. I would plan on recording 2 full LP’s per CD. A decision must be made on how to record the LP’s, by artist or random selections from different albums. Remember, you have the option to record by individual song tracks. This is a great way to mix and match songs on a CD for listening later.
If you own some classical LP’s they may have only 1 song track per side, for a total of 2 tracks as one side is the whole record.
Miscellaneous Information
Under normal ware, turntable needles will last for up to 50 hours of recording time before the need to replace them when recording LP’s or 45’s. This will equate to about 40 CD’s. Determine how many CD’s you will be recording and purchase the number of extra needles accordingly. If you are recording lots of music, you should clean the CD lens in the unit every six months of heavy recording. Otherwise, once per year. If your car has a CD player don’t forget to clean the lens in it every year as well.
Clean the record first before recording it. This will enhance the listening sound when played in the CD player by reducing the hisses and pops.
Be sure to use blank CD-R or CD-RW Music CD’s for recording. You should find the words MUSIC somewhere on the packaging. The unit will not work using any other type of blank CD.
Shop Recorders and Supplies
Below you can shop for the recorder and accessories to record your vinyl records to CD. These items are on Amazon where you can place the order. There is a limited number of the Teac GF-350 units on Amazon. We have included other units that convert vinyl, cassettes, and CD’s to MP3 files.
As an Amazon Associate I earn from qualifying purchases.